WordPress guide
Fluent Forms: sign straight after submitting
Connect a Fluent form to a SignSealer workflow once, and every submission ends on the signing page with its details already on the agreement.
Before you start
- The plugin installed and this site connected (the getting-started guide).
- Fluent Forms, active, with the form you want signed.
- A form in SignSealer, under Forms & QR, made from the template the customer should sign. The plugin calls it a workflow.
Step by step
The words in bold are the words on the screen.
Open SignSealer → Forms
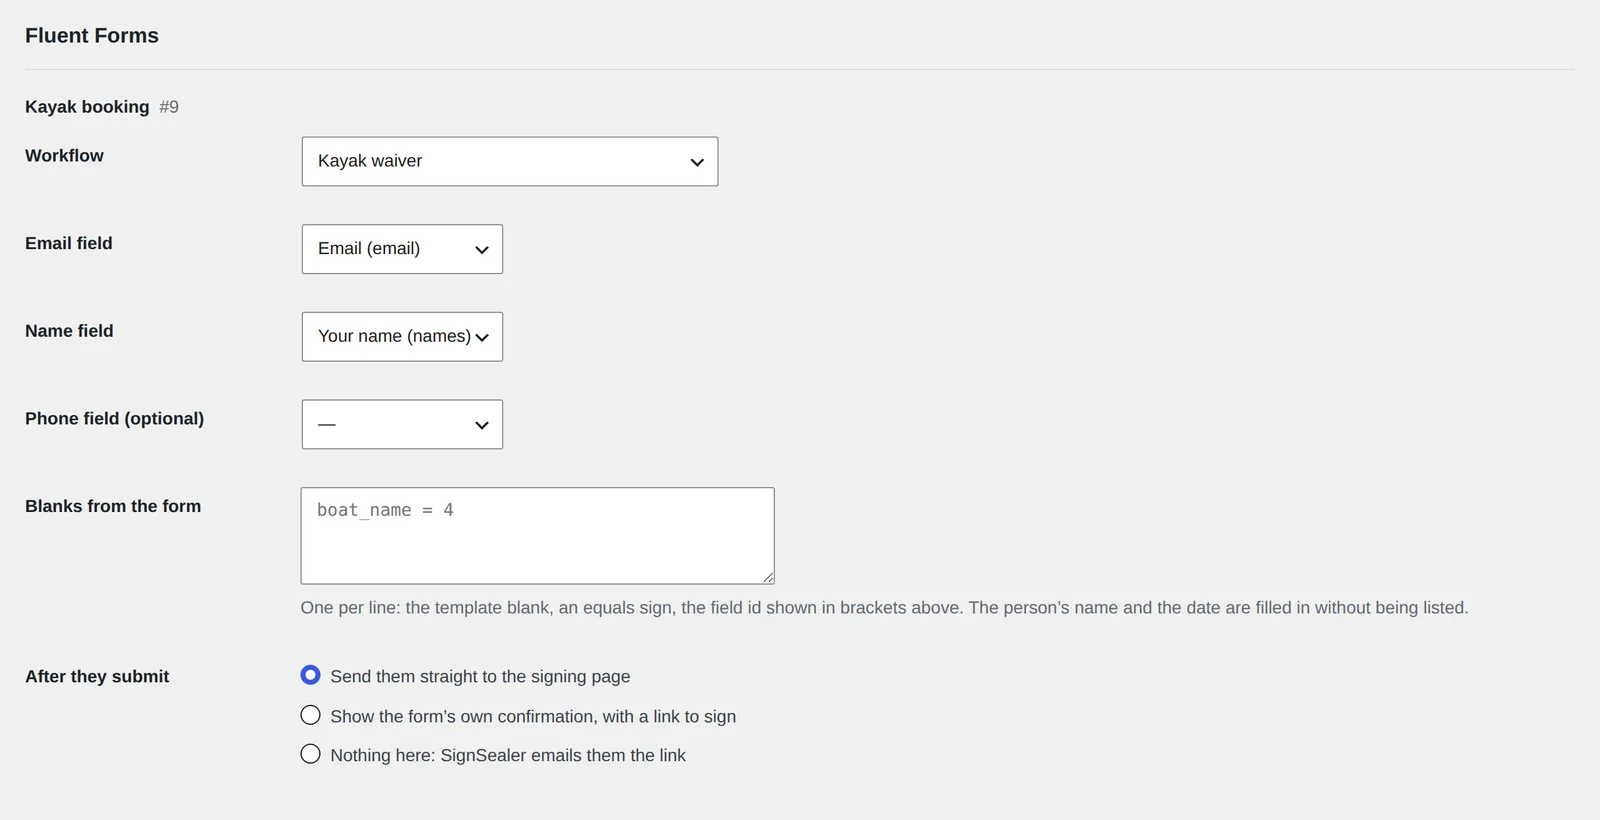
In the WordPress menu, open SignSealer → Forms. Every Fluent Forms form on the site is listed under its own heading, with its title and number.
Choose the workflow
Beside Workflow, choose the form in SignSealer this one should start. A form left on Nothing works exactly as it did before.

Say which fields hold the email and the name
Choose the Email field and the Name field from the form's own fields; the number in brackets is the field's id. Add the Phone field if you send reminders by text. Only the fields you choose are sent to SignSealer.

Fill other blanks from the form (optional)
If the template has blanks like a boat name or a pickup date, write one line for each under Blanks from the form: the blank's name, an equals sign, and the field id — for example
boat_name = 4. The person's name and today's date are filled in without being listed. Dates and times from the form are written out in words on the agreement.Choose what happens after they submit
Send them straight to the signing page is what most people want. Show the form's own confirmation, with a link to sign keeps your confirmation message and adds the link to it. Nothing here: SignSealer emails them the link leaves the form as it was and lets the email do the work.

Save, and try it
Press Save, then fill the form in yourself on the page where it lives. With Send them straight to the signing page you land on SignSealer's page. The submission in Fluent Forms → Entries shows the document, and its log says what was sent and when it was signed.
What happens next
- The submission keeps the document's id, title and status, with a line in its log each time that changes.
- After signing, the person is offered the way back to the page the form was on.
If something is not right
My name field has first and last name parts.
Choose the name field itself; the plugin joins the parts.
Still stuck? Tell us what you see and which plugins the site runs.
The other guides
Getting started
Install the plugin, connect it to your SignSealer account with one button, and make the document your customers sign. About ten minutes.
WooCommerce
Mark the products that need an agreement. The customer signs after paying, on ordering, or before payment at checkout, and the order shows it.
WooCommerce Bookings
A booking you confirm starts its agreement straight away, paid or not, with the date, time, party size and resource filled in.
Gravity Forms
Connect a Gravity form to a SignSealer workflow once. Each submission ends on the signing page, with the person's details already on the agreement.
WPForms
Connect a WPForms form to a SignSealer workflow once, and every submission ends on the signing page with its details already on the agreement.
Contact Form 7
Connect a Contact Form 7 form to a SignSealer workflow once, and every message sent ends on the signing page.
Signing button
The SignSealer agreement block or a shortcode puts a Sign now button on any page: for walk-ups, a class page, or a form plugin not supported yet.

Ready when the next guest is.
Free for the first 25 agreements a month. No card to start.