WordPress guide
Getting started with the WordPress plugin
Install the plugin, connect it to your SignSealer account with one button, and make the document your customers sign. About ten minutes.
Before you start
- WordPress 6.4 or later and PHP 7.4 or later.
- The site on https. SignSealer checks the plugin is really running on your site before it connects, and it only does that over https — which is also how signed statuses come back.
- An administrator account on the site.
- A SignSealer account. If you do not have one yet, you can make it in the middle of connecting.
Step by step
The words in bold are the words on the screen.
Install and activate the plugin
Download the plugin zip from signsealer.com/wordpress. In WordPress open Plugins → Add New Plugin → Upload Plugin, choose the zip, press Install Now, then Activate. A line at the top of the plugins screen points to Start here.
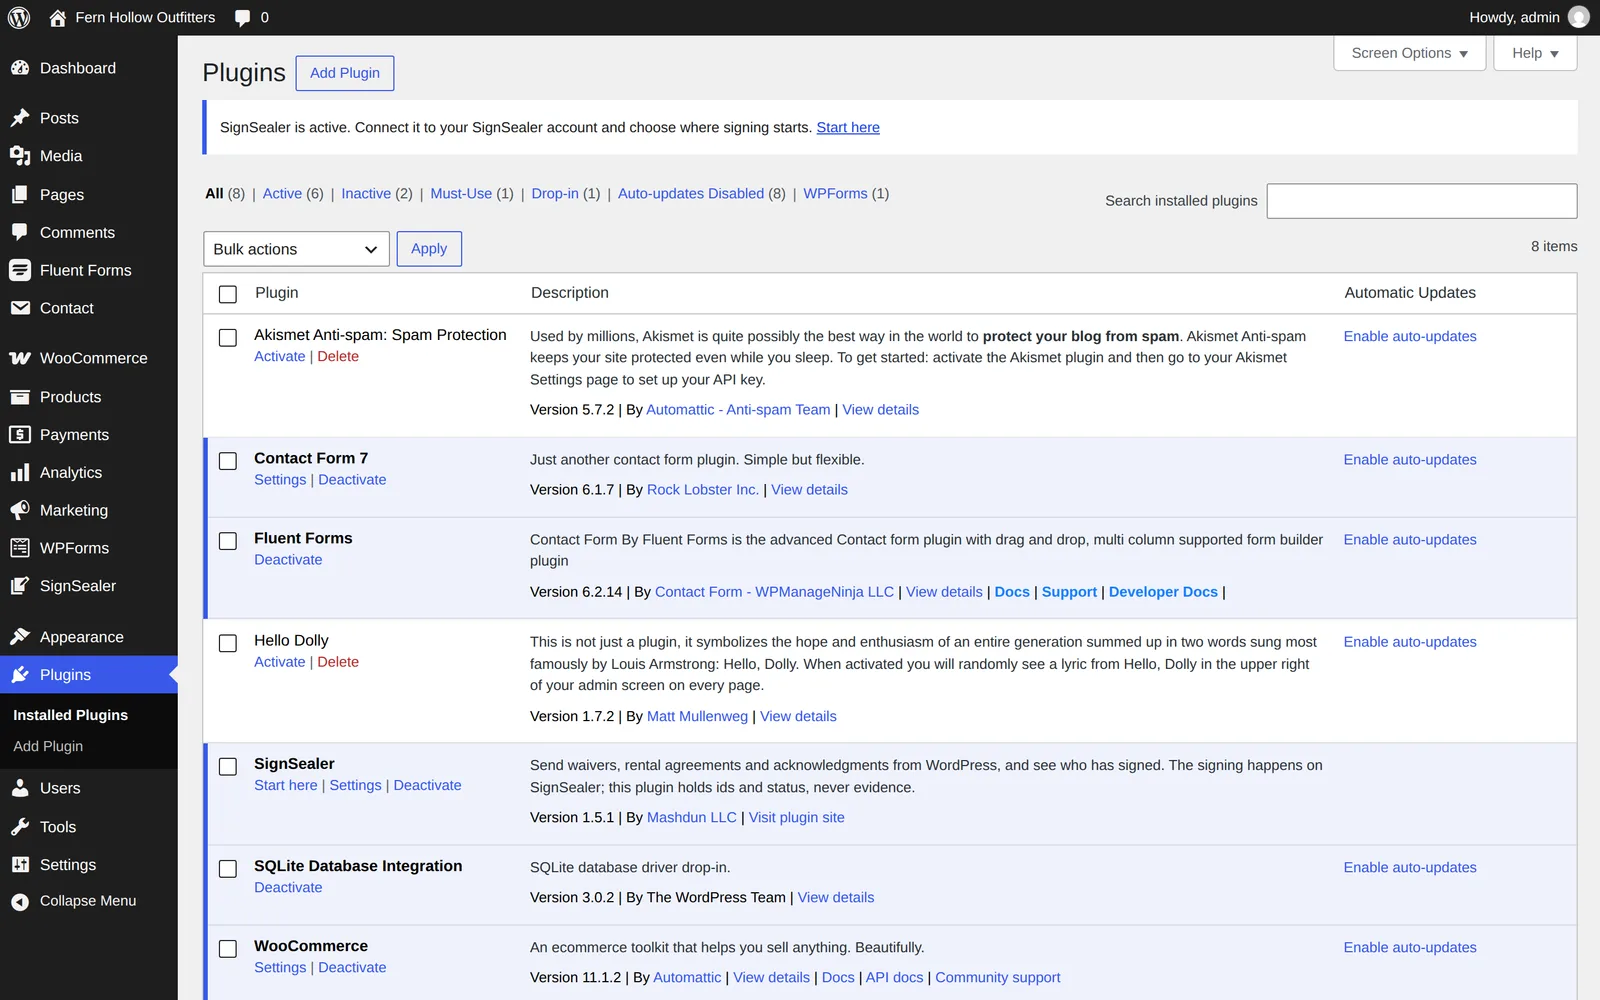
Open SignSealer → Start here
SignSealer has its own item in the WordPress menu, below WooCommerce and the form plugins. Start here says what the plugin does and has the Connect button.
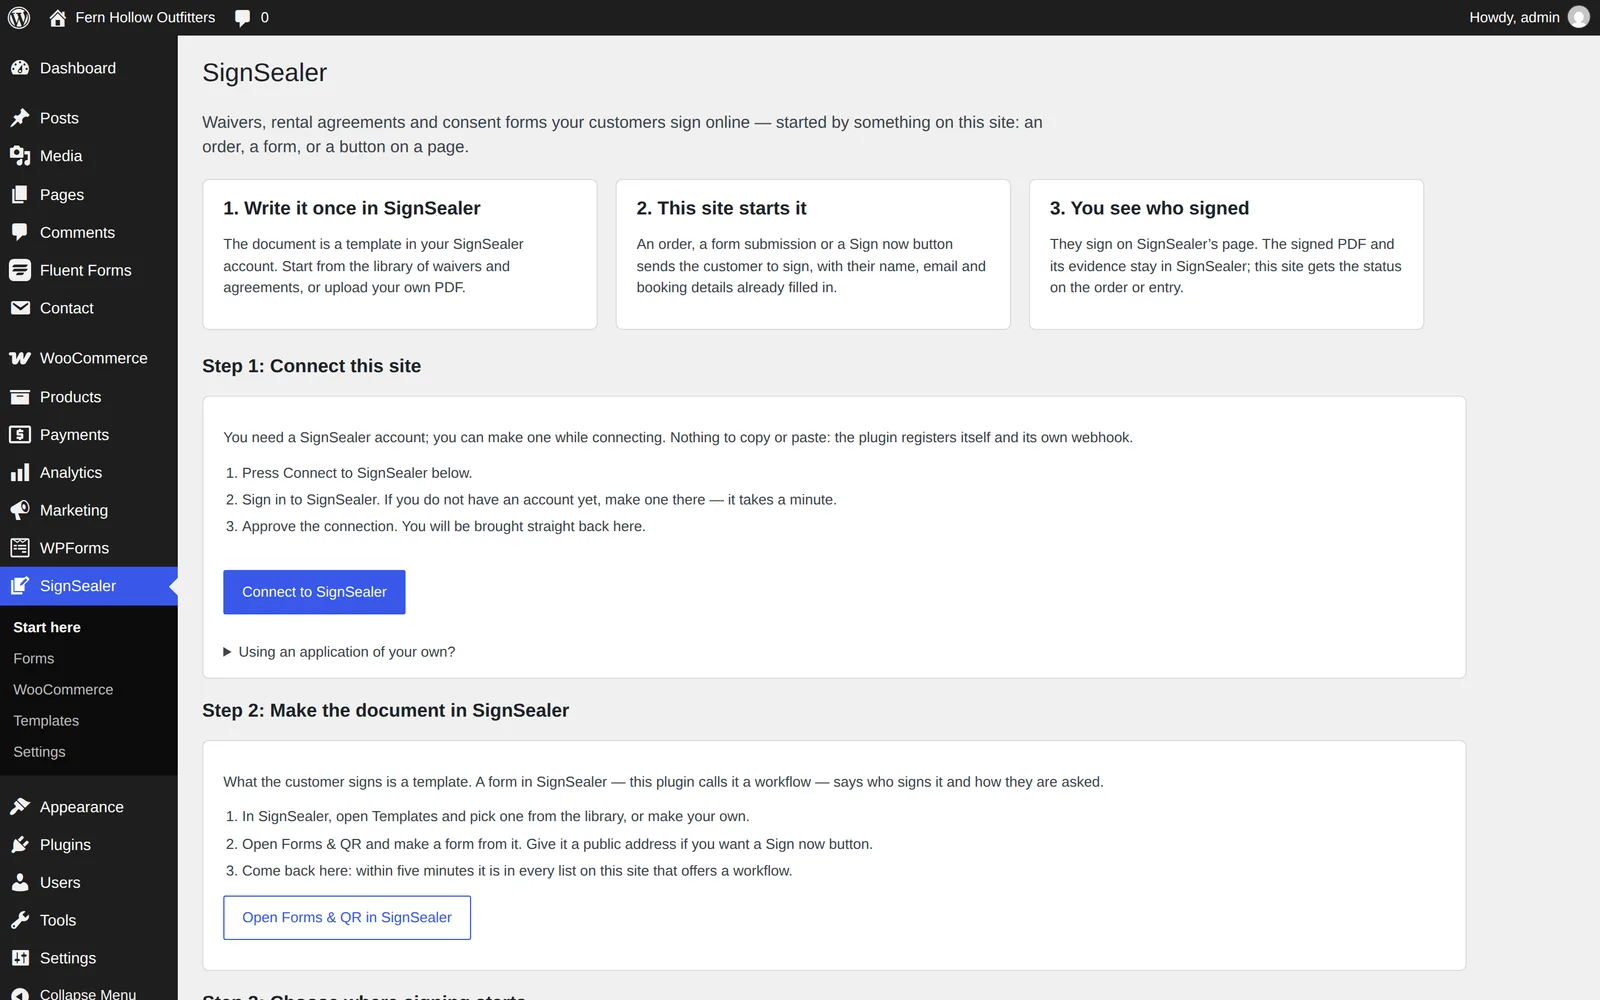
Press Connect to SignSealer
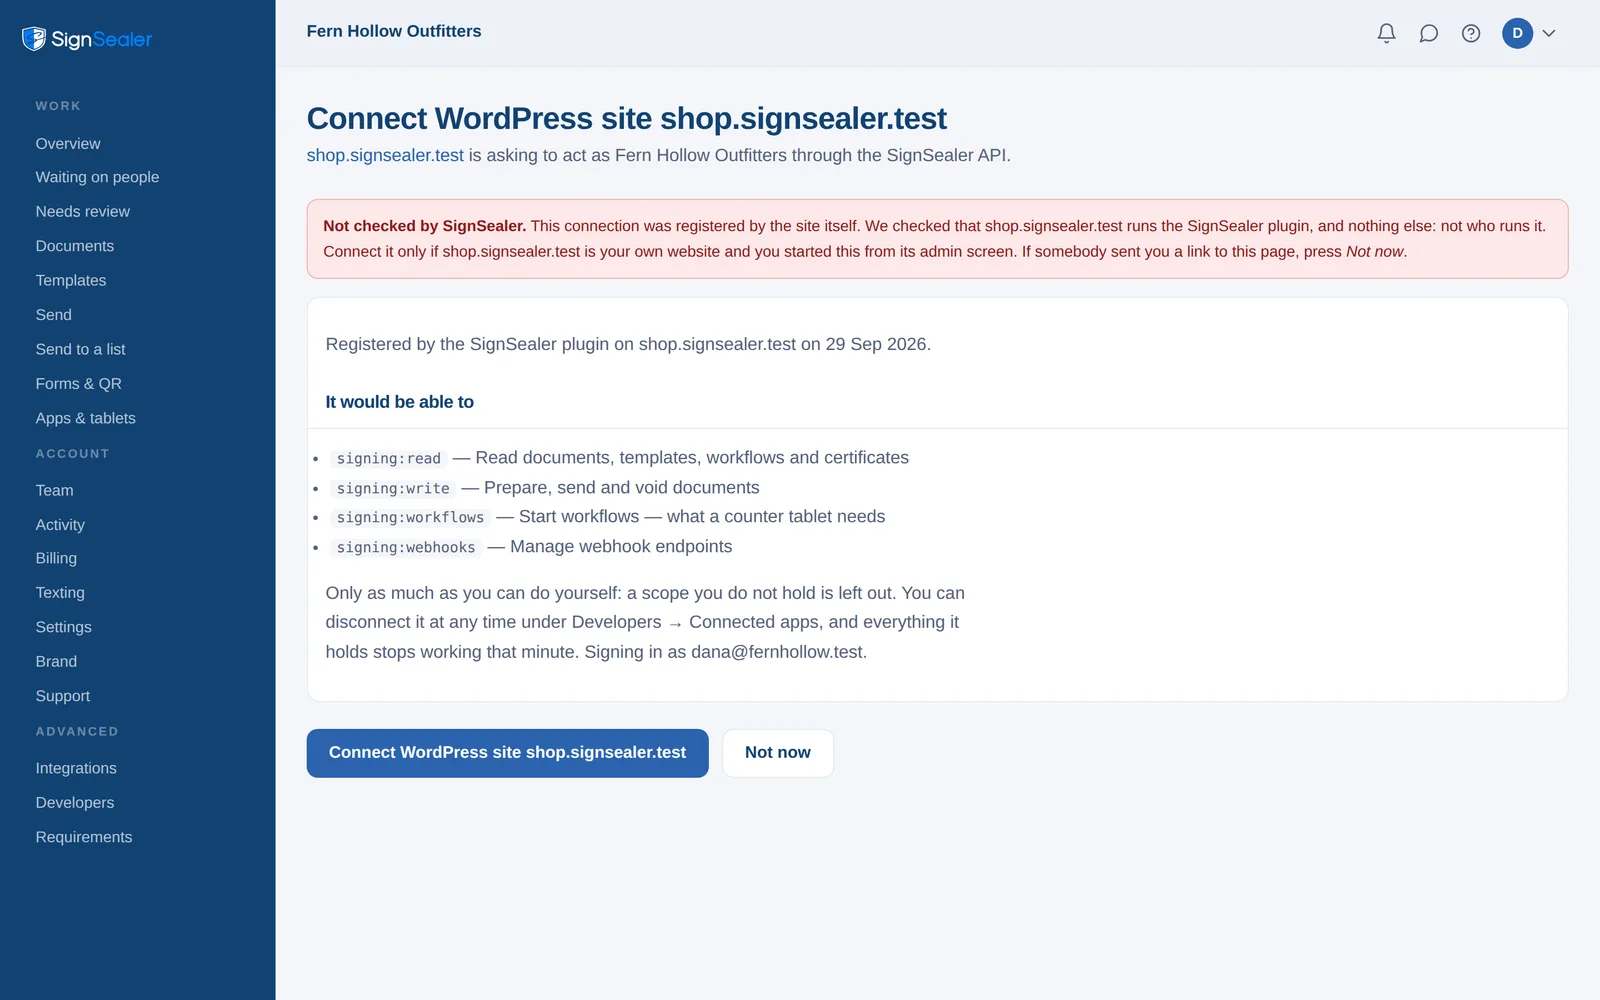
You are taken to SignSealer. Sign in, or make an account there; choose the business this site belongs to if you have more than one; read what the site will be allowed to do, and press Allow.
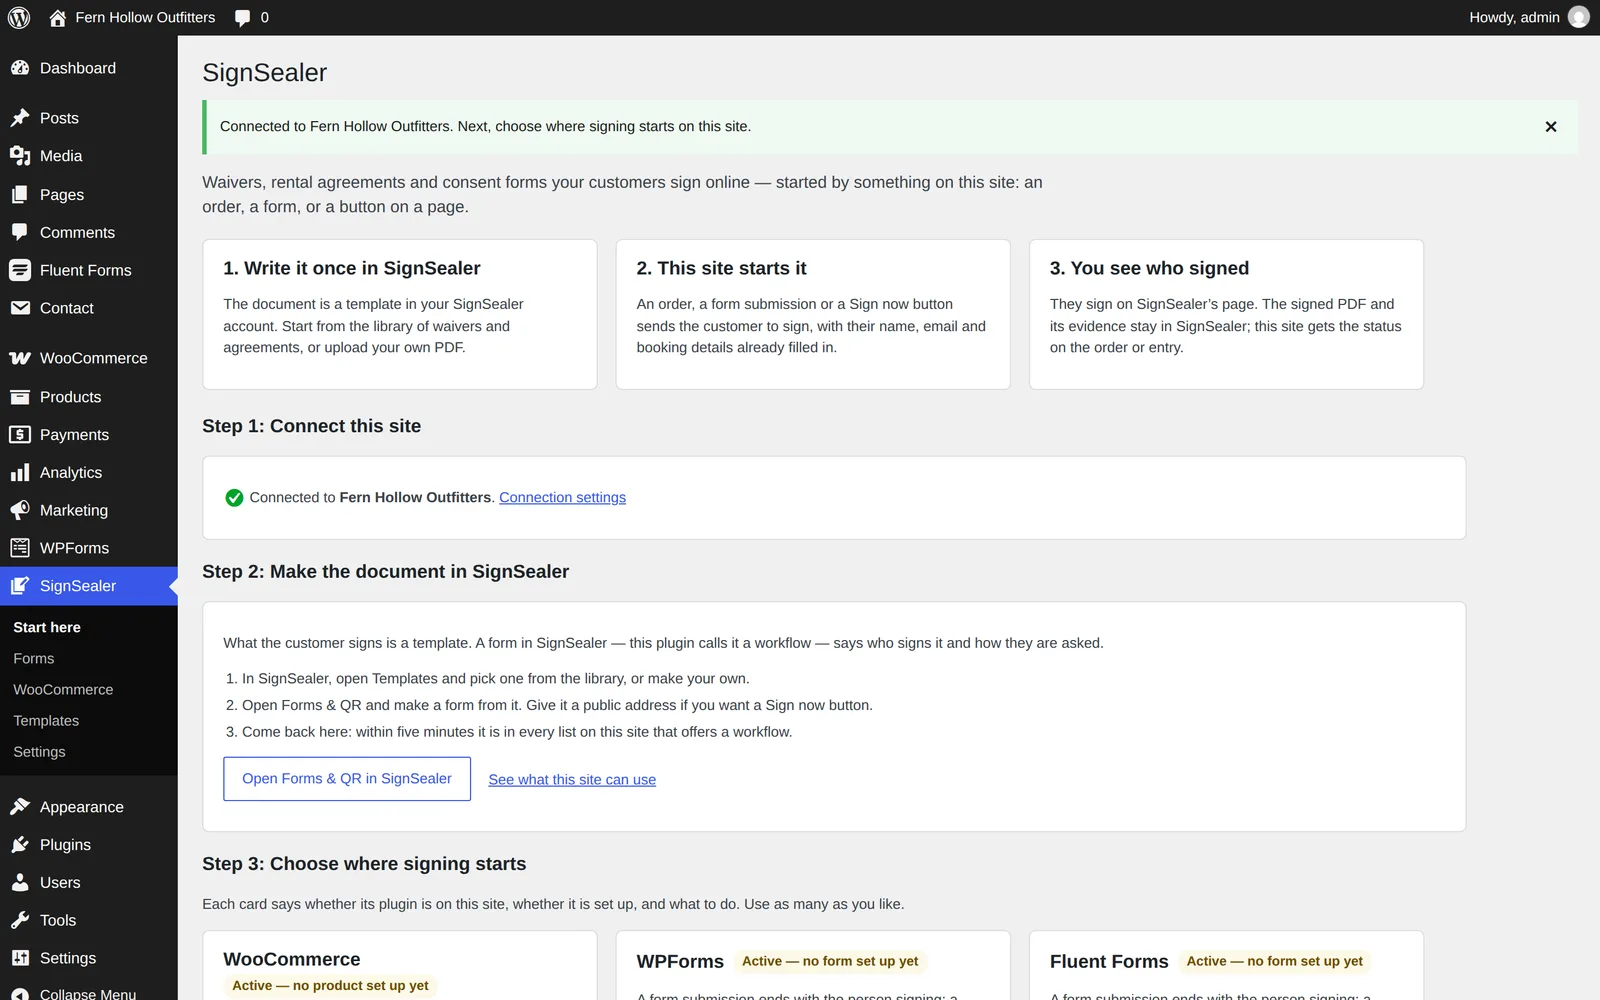
You are back, connected
Start here now says Connected to and your business's name. The plugin has registered itself and the address SignSealer posts signed statuses to. There is nothing to copy and no secret to paste.
Make the document in SignSealer
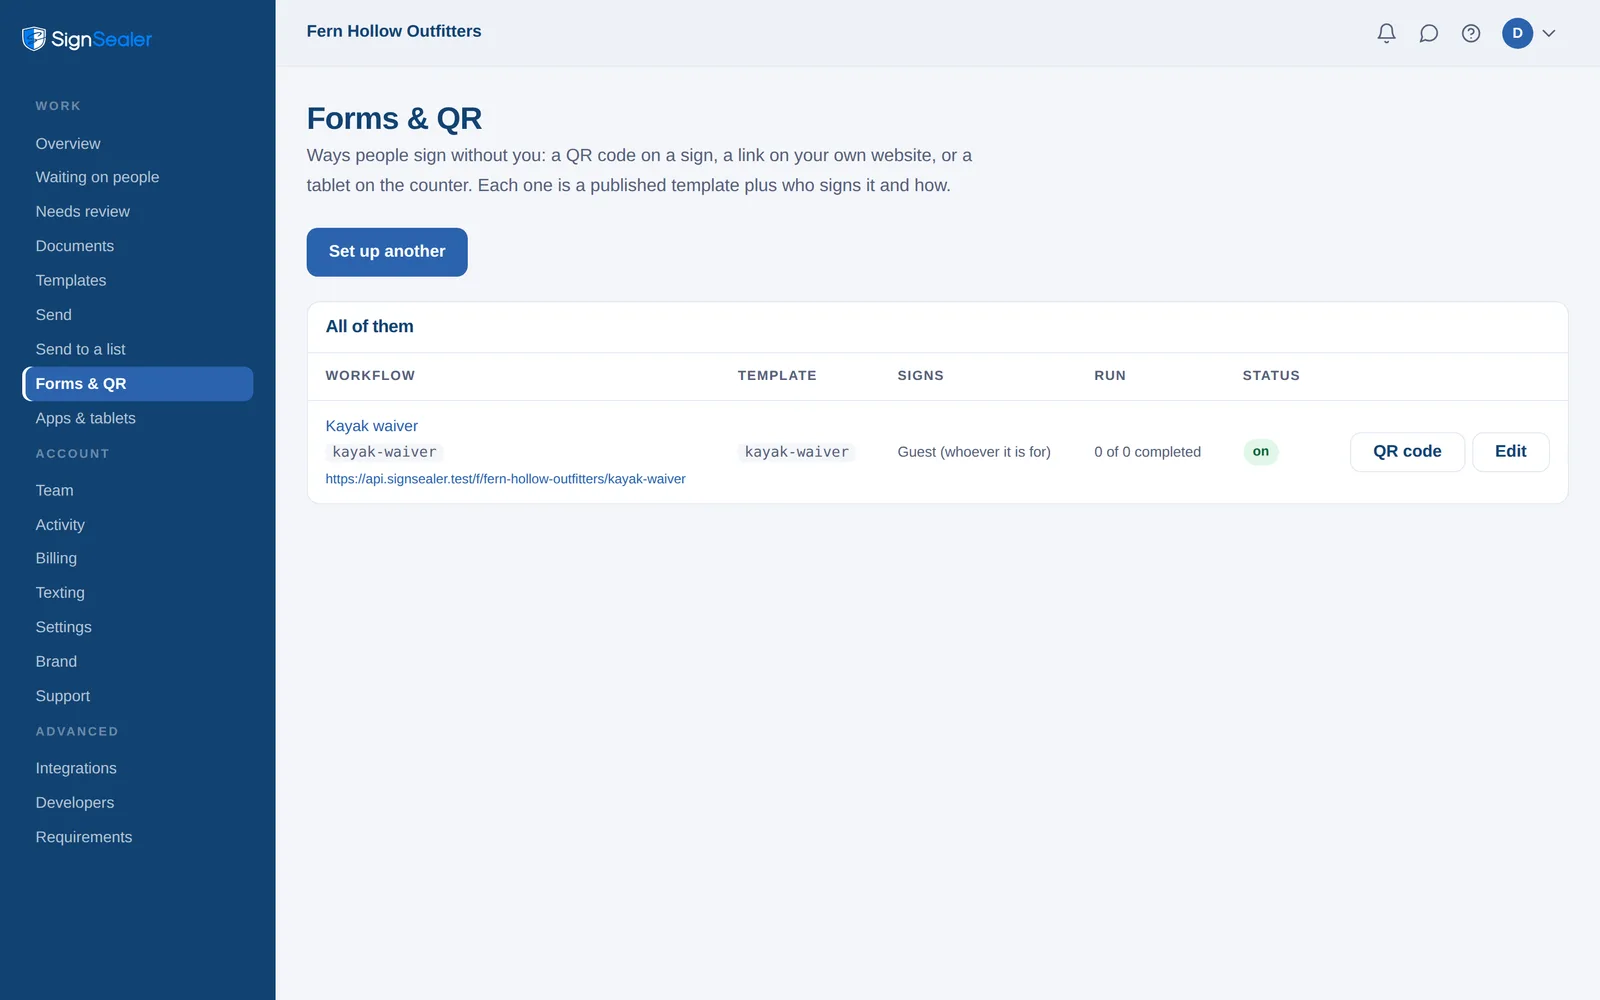
In SignSealer, open Templates and pick a waiver or agreement from the library, or upload your own PDF. Then open Forms & QR and make a form from it: this is what WordPress starts, and the plugin lists it as a workflow. Give it a public address if you also want a Sign now button on a page.
Choose where signing starts
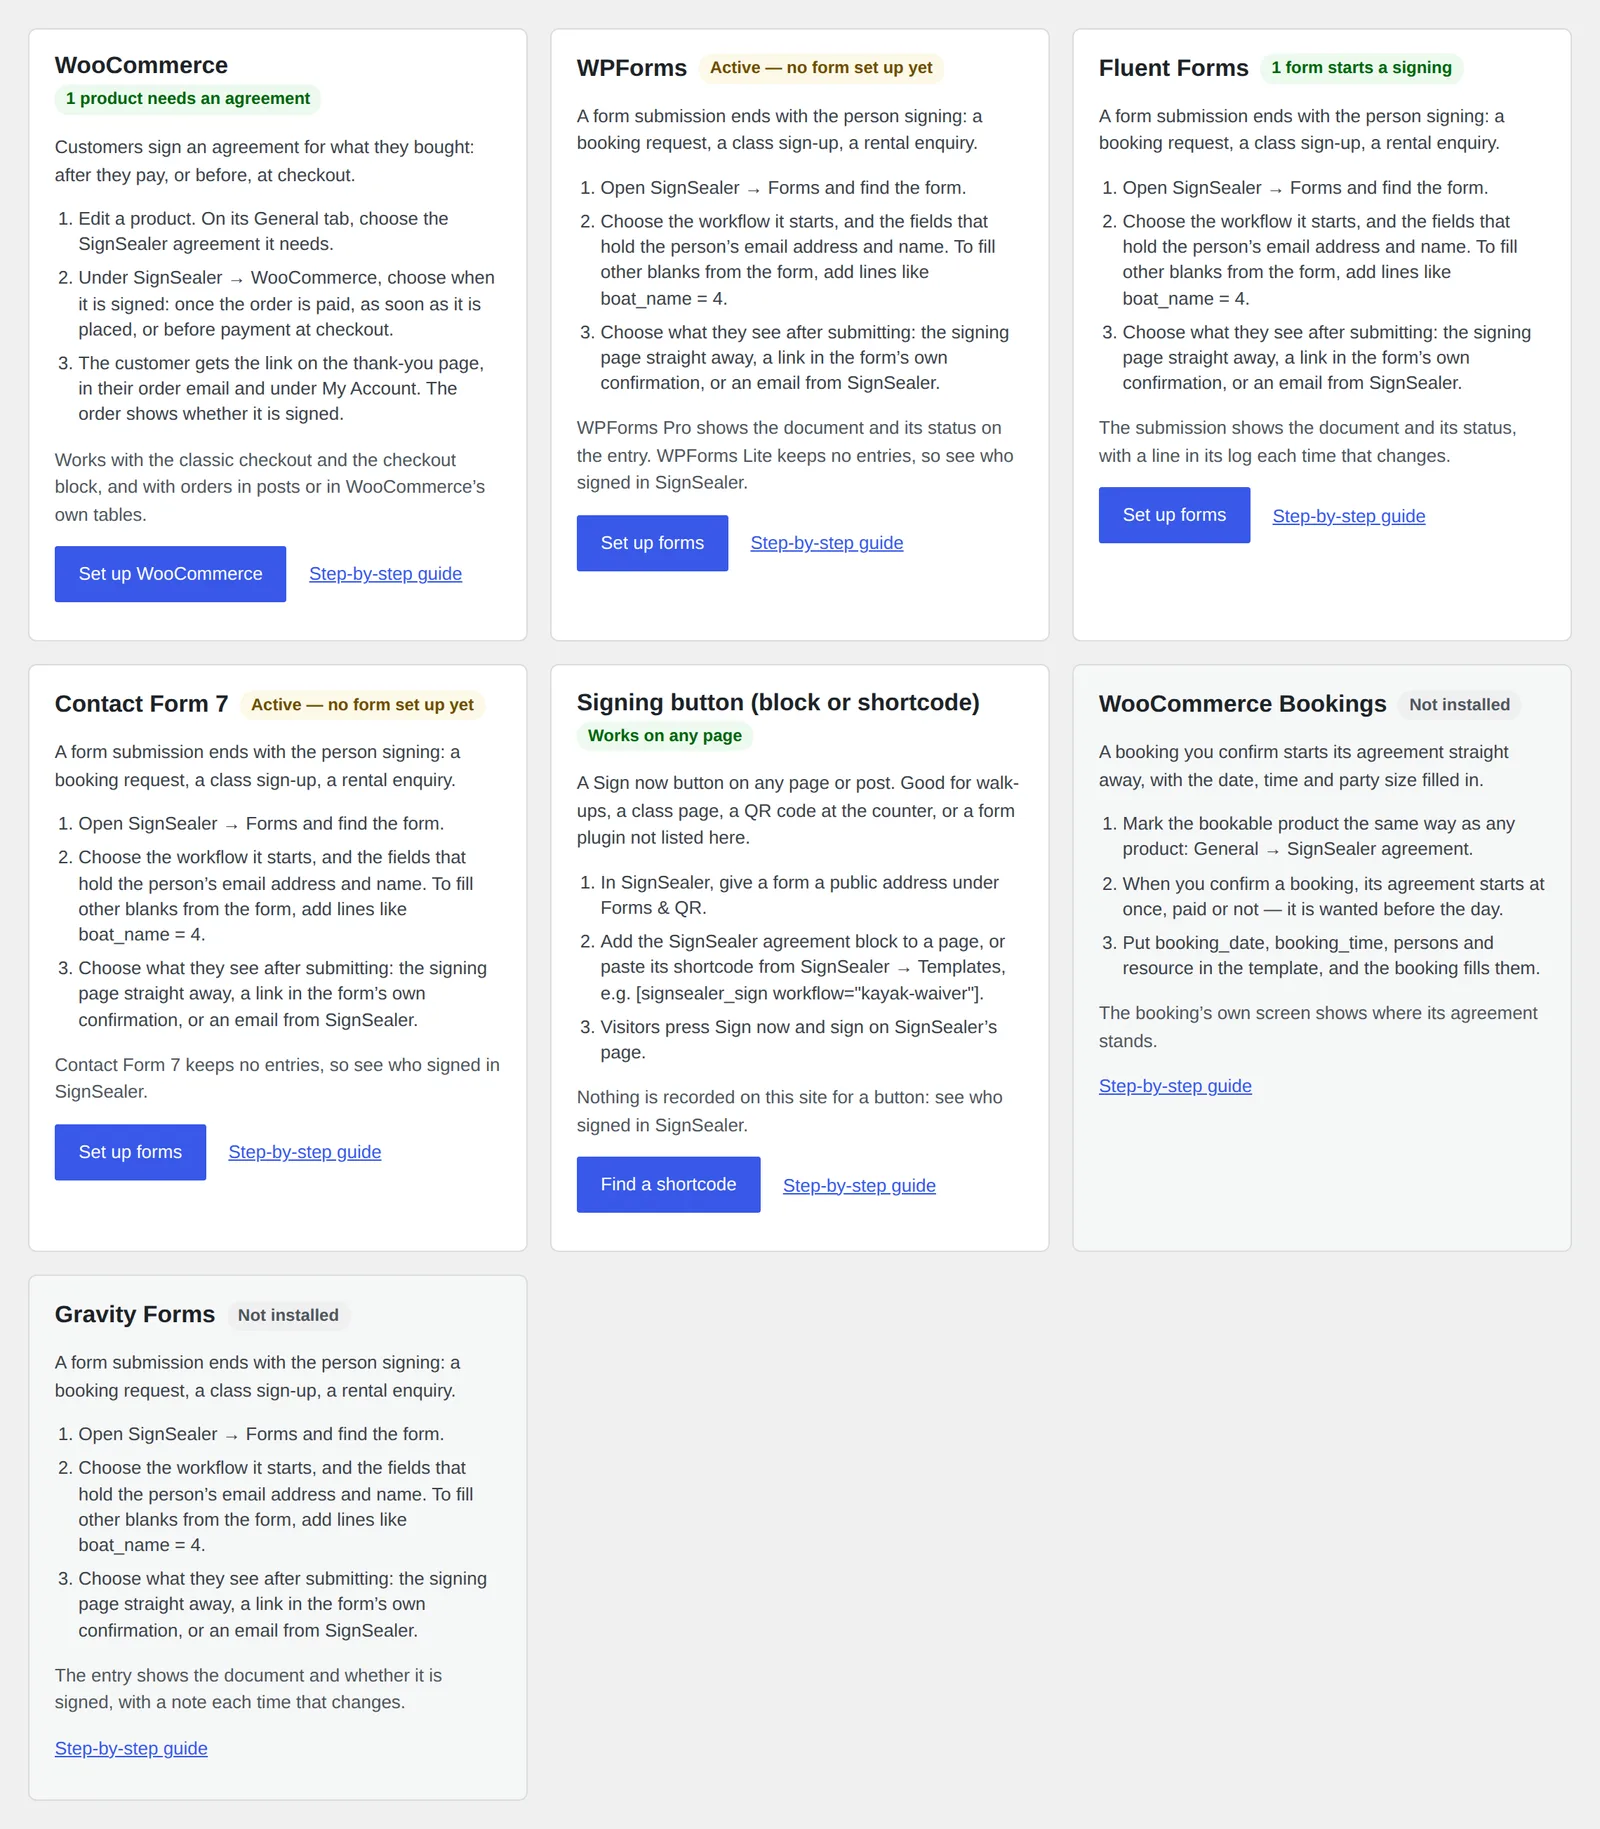
Back in WordPress, Start here has a card for each integration — WooCommerce, WooCommerce Bookings, Gravity Forms, WPForms, Fluent Forms, Contact Form 7 and the signing button — that says whether its plugin is on your site and whether it is set up. Each has its own guide below.
What happens next
- The site is connected to one SignSealer business, over OAuth: SignSealer holds the signed documents and their evidence, and WordPress keeps each document's id and status.
- You can end the connection from SignSealer under Developers → Connected apps, without touching WordPress.
If something is not right
The Connect button says the site is not on https.
Turn on SSL for the site at your host (on Hostinger, for example, under Security → SSL), wait until your site opens with https in the address bar, and press Connect again. A certificate that has only just been issued can take a few minutes; until then the browser shows an error such as ERR_SSL_PROTOCOL_ERROR.
SignSealer says it cannot reach the site, or that the site did not show the token.
SignSealer fetches a small page from your site (/wp-json/signsealer/v1/site) to check the plugin is really there. A security plugin or firewall that blocks the WordPress REST API from outside stops that; allow that one address and press Connect again.
It says the connection attempt has expired.
An attempt lasts thirty minutes. Press Connect to SignSealer again; the plugin reuses what it set up the first time.
It says the connection was not approved.
Deny was pressed on SignSealer's screen, so nothing changed. Press Connect again and choose Allow.
Where did Settings → SignSealer go?
Since version 1.5.0 SignSealer has its own item in the WordPress menu, with Start here, Forms, WooCommerce, Templates and Settings under it. Old links to the Settings pages still work.
Still stuck? Tell us what you see and which plugins the site runs.
The other guides
WooCommerce
Mark the products that need an agreement. The customer signs after paying, on ordering, or before payment at checkout, and the order shows it.
WooCommerce Bookings
A booking you confirm starts its agreement straight away, paid or not, with the date, time, party size and resource filled in.
Gravity Forms
Connect a Gravity form to a SignSealer workflow once. Each submission ends on the signing page, with the person's details already on the agreement.
WPForms
Connect a WPForms form to a SignSealer workflow once, and every submission ends on the signing page with its details already on the agreement.
Fluent Forms
Connect a Fluent form to a SignSealer workflow once, and every submission ends on the signing page with its details already on the agreement.
Contact Form 7
Connect a Contact Form 7 form to a SignSealer workflow once, and every message sent ends on the signing page.
Signing button
The SignSealer agreement block or a shortcode puts a Sign now button on any page: for walk-ups, a class page, or a form plugin not supported yet.

Ready when the next guest is.
Free for the first 25 agreements a month. No card to start.